What is the best photography paper? Choose the ideal one and give quality to your photos!

What is photography paper

Are you fond of the art of photography? Have you thought about what photography paper could help improve your works? We cannot deny that, thanks to the return of some vintage trends, printed photos continue to have a special place in the memory of many, despite the boom in digital photography. 

Today, photographers are tasked with capturing great moments with the best possible finish , especially when developing photos, but this is not always easy to achieve. 

There are several styles of photo paper, each with a specific purpose. As a photographer, you must know all the photography papers and their characteristics to provide the best possible quality photos to all your clients.

If you want to know more about the types of photography paper, you have come to the right place. In today’s article, you will learn what photo paper is and why it is important. In addition, you will know what types of photographic paper exist and how to choose the best one for what you are looking for.

Grab your camera and all your implements that we are going to start!

What is photo paper?

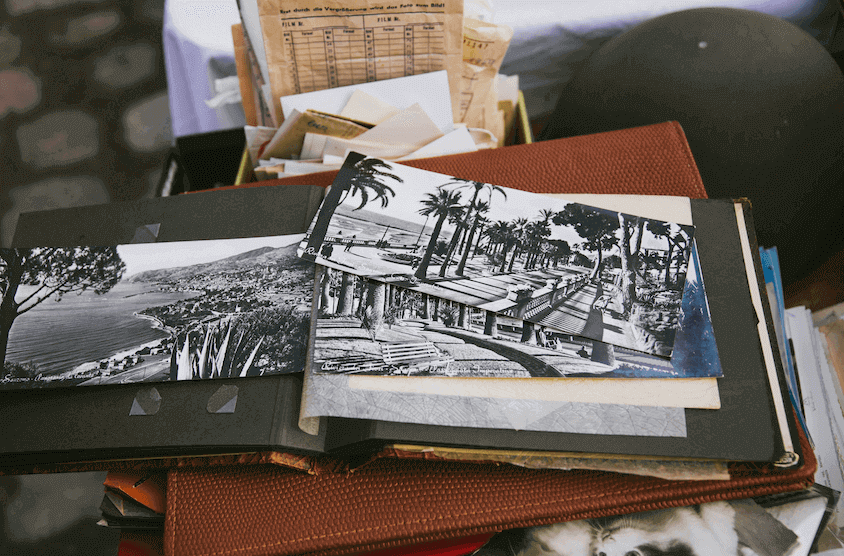
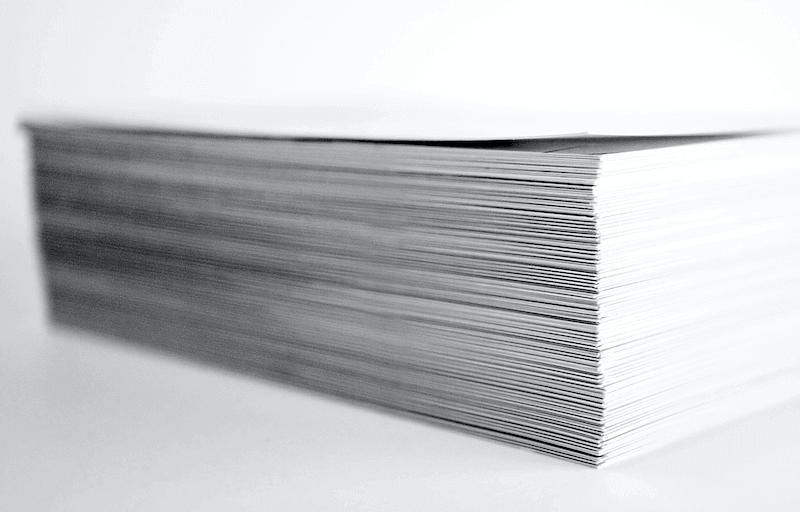
Photo paper or photo paper is a special paper designed exclusively for printing images and photos.

Although we will touch on this point later, you need to know that there are different types of photography paper, depending on their weight or grammage . But in general, photo paper is heavier than regular papers, which means it has higher strength.

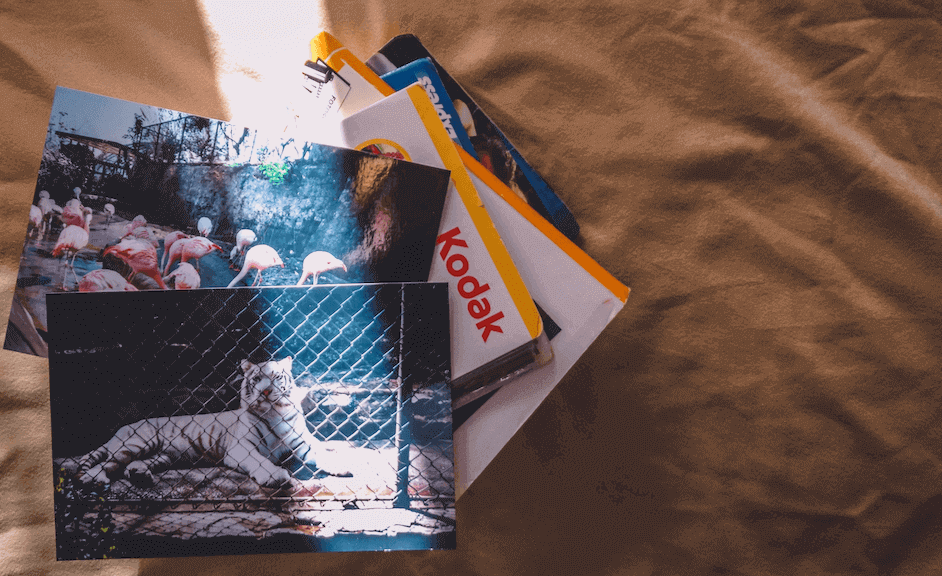
This is essential, because when you print a photograph, you want it to last over time , either by placing it in a painting or by saving it in a photo album. Thanks to the photo paper, your captured moments will last for a long time in good condition. 

It is important to consider that the heavier the photo paper, the firmer and more solid it will be. That is, it will be more resistant to any damage or bending that the image may suffer. Likewise, it is necessary to know that only one side of the photo paper is designed to hold the printing , since it will absorb the ink.

Source: Unsplash

Next, we are going to know the importance of using photography paper and how it can benefit you as a photographer.

Article

Try Crehana Premium for free and access the entire course catalog for 24 hours

Try it for free

Why use photo paper?

All photographers know that a good image must be able to reflect every aspect captured in the camera lens. In the same way, they hope to be able to convey that same concept when printing their photograph.

In simple words, for the art of photographers to be transmitted 100%, it must try to reflect reality as if it were seen by the eyes. Definitely, to achieve this, you need not only a good camera and lens, but also a suitable photo paper.

The main difference between traditional paper and photo paper can be seen when printing the final product. Plain paper does not absorb the same amount of ink, which makes the photo dull. On the other hand, photography paper offers better reproduction of the captured image.

Likewise, it allows to obtain a final development with better contrasts and without any type of stains or smudges , since the ink dries quickly. So, if you are looking for the best finishes for your photographs, you should know about the types of photography paper.

Why use photo paper

Source: Unsplash

Types of photo paper

It is necessary to specify that you should not be left with a single photo paper for all your works. The factors that will define what type of photographic paper to use are varied and depend on each specific situation, so be very careful with that. 

L’Atelier Canson , a space specialized in creative professions, presents four types of photographic paper. Next, you will know all the types of photography paper that exist and how to use them.

1. Matte papers

The main characteristic of this type of photography paper is that it is opaque, so it does not reflect any type of light. In addition, it has a grainy texture, as if there were sand or small dots on top of the photograph. 

This type of paper is usually recommended for old photos, since due to its grainy material, it has a greater resistance over time. Also, as we mentioned, as it does not have much brightness, it is recommended to use this photographic paper for photography in black and white or opaque colors, such as photography in sepia.

Now, the de rigueur question is: How do you know if it is the ideal paper for printing? Some of its benefits are as follows.

  • Colors are more realistic.
  • The ink stays perfectly on the paper. 
  • Resistance to touch, friction and humidity.
  • If you want to put your photos in frames or pictures, this paper does not stick to the plastic or glass of ordinary albums.
matte photo paper

Source: Unsplash

2. Eggshell or gloss papers

Another type of photography paper that we have is semi-matte or gloss paper. This is similar to the previous one, but they have some specific differences. 

In the case of semi-matte photographic paper, the surface is not totally opaque, so good finishes can be achieved if the photograph has a wide color gamut or if the shadows are worked a lot. In addition, like the previous photo paper, dark colors stand out and avoid strong glare.

One of the most remarkable characteristics of this type of photography paper is that, after the photos are printed, the drying process is very fast. It also resists stains, water splashes, fingerprints and scratches very well. Lastly, semi-matte photo paper has a high ink-receiving capacity. 

We recommend using this type of photo paper for large portraits and reports as well as black and white photos. Also, it is excellent for photography of events, such as weddings or communions.

semi-matte paper for photography

Source: Unsplash

3. Glossy papers

This is probably the most common photo paper and the one you are most familiar with. If you see a painting in your house or a photograph of yourself in an album, it is likely that it was printed on glossy photographic paper. 

In addition to being characterized by being a very commercial photography paper, it also has a fairly soft and even “slippery” touch, since the surface is quite smooth. This allows the colors and lights in the photo to stand out more. 

Printing on glossy paper is more used for small-sized photos, because it requires a lower level of detail.

Among other advantages of glossy photo paper, we can say that it is very light. Unlike previous papers, this photo paper is quite light; however, this, in turn, makes it more fragile. Also, on glossy photo paper, the contrast between blacks and colors is much better appreciated, as the highlights add a more lively touch to the final product. 

We recommend using this type of paper to print images that have saturated colors, such as sunset and spaces with many colors, among others.

glossy photo paper

Source: Unsplash

4. Fine-art papers

Last but not least, we have fine-art photo paper, or better known also as professional photo paper. As its name suggests, the finishes and quality of this type of photo paper is far superior to classic papers.

This professional photographic paper has natural composition fibers, mostly cotton or alpha-cellulose. This allows the paper not to be artificially bleached with chlorine, so the durability of these photographs is guaranteed.

As we are talking about a photography paper oriented to high quality and high-end work, the price of its preparation and printing increases. There are even special printers to work with this type of material. Without a doubt, if you have the necessary resources, you will get great photos with this professional photo paper.

So, if you dedicate yourself to photography professionally and are looking to obtain a leap in quality or want to participate in an important contest , do not hesitate to invest to work with this type of photographic paper.

Now that you know the advantages and disadvantages of the types of photographic papers, you are probably wondering which one is the best for me? Do not worry! We will take a closer look at this below. 

How to choose the ideal photo paper?

Well, you already know the different types of photography paper that exist, but, if you are a beginner photographer who does not know much about it, it is likely that you will not be able to correctly define which photography paper is ideal for your work. 

Next, we will explain five elements that you should consider to choose the best photography paper.

1. Opacity

The higher the opacity, the greater the possibility that the ink will pass through the paper. If you can see through the paper, it means you shouldn’t use it, as this is a sign that the photo paper is too thin for these types of photos. 

Why is it bad? This can cause a mixture of colors in the photo. Also, if you are looking to print on both sides, choosing a thin photo paper is not the most convenient, as it will not support double printing and will probably warp.

opacity on photo paper

2. Brightness

If your works are characterized by having a lot of brightness or flashes of light, it is important to bear in mind that you need a white photo paper. Photo papers usually have a standard gloss of 90 on a scale of 1 to 100. 

Also, if you want to print vintage-style or low-color photos, you could try using a photographic paper with a low gloss, such as about 70 points.

glitter on the photo paper

Source: Unsplash

3. Weight

Another aspect that is often taken into account when choosing a photo paper is weight. A heavier paper is usually more durable and stiffer, so it won’t wrinkle easily. 

Photographic paper, in general, usually weighs between 90 and 270 grams. The higher the weight, the better the quality of the paper. Keep in mind that not all printers resist all types of paper, so look for the allowed ranges to be the ones you will use to print photos.

photo paper weight

Source: Unsplash

4. Gauge

The gauge or density refers to the width of the paper. Its gauge is measured in millimeters or thousandths of an inch.

For photographic paper the gauge is between 7 and 10 mm or 220 to 300 mm. It is important for the conservation of the photograph, since the higher its density, the greater the resistance will be the photo.

photo paper gauge

Source: Unsplash

5. Finish

This is one of the main elements that characterize the different types of photographic papers. There are different finishes based on what you are looking for, whether it is a matte or glossy tone. 

There is no one style of photo paper finishing better than the other, it really has to do with your tastes and those of your clients. However, if you are looking for a recommendation, we consider that if there are finishes that are better suited to the types of photography . 

For example, if you are working on a commercial photo, a bright style is recommended. On the other hand, if you are looking to take more artistic and durable photographs, it is best to use a matte finish.

For tastes and colors, the authors have not written!

photo paper finish

Tips for your best photo paper option

Still can’t make up your mind? We want your first photographic impressions to be amazing. We have some tips that can help you choose.

  • If you are really a beginner and you are going to make your first photographic impression, it is best to talk to someone with a little more experience for advice. In this way, you will learn little by little from the hand of an expert.
  • If you can’t decide on gloss or matte, you can try both. Remember that there is no one better than the other, little by little you will discover what style of photographic paper suits your photographs best. 
  • Don’t jump in without trying all types of photo paper first. Avoid buying photo papers in large quantities if you are not sure what type of paper you want. 
  • The size of your photo will allow you to have a reference of what type of photographic paper goes best with your photo. 

Also, if you want to expand your photography knowledge, it is always good to take a course that helps you broaden your horizons. 

At Crehana we recommend the online photography course from scratch: Travel and capture the world . During the classes, the photographer Arturo Bullard tells us that one of the most important elements of photography is the printing paper.

The expert explains that, at the end of a routine or extensive trip in which we have taken a large number of photos, it is important to select and archive those images that we consider most relevant. Subsequently, you must look for the best photographic paper based on its characteristics to obtain an incredible result. 

You can not lose this!

Tips for choosing photography paper

The best photographic papers on the market

Now that you know the different types of photography paper that exist and which one is the best for you, what do you think if you know what the current trends in photographic papers are? 

Next, we will mention some brands with different qualities, prices, utilities, styles and finishes, so that you can choose the one you like the most.
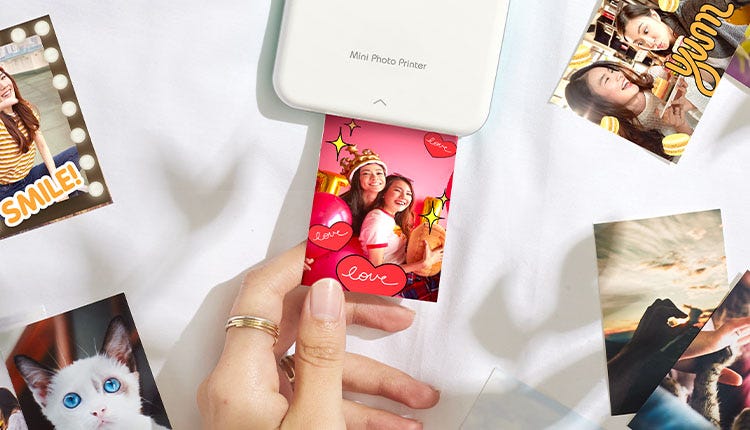
1. HP ZINK

This type of paper is different from the conventional one, because it allows you to convert the images into stickers. By printing photos on this photo paper, the images become resistant to water, smudges and tearing.
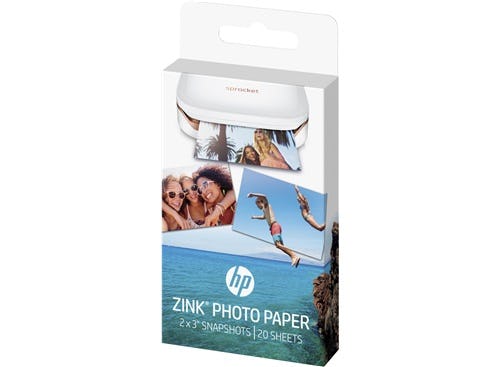
hp zink

Source: HP Store

2. Polaroid Premium

Who has not wanted to have a Polaroid and print photos in retro style. Without a doubt, snapshots are back in trend and the photo paper used in these cameras is of very good quality.

This type of photo paper uses Zero Ink technology, which provides easy printing without excess ink. Without a doubt, if your thing is the vintage style, this photographic paper is for you. 

Polaroid photo paper

Source: Amazon

3. Kodak Glossy Instant Dry

This photo paper is A4 size. It has great capacity for fast ink absorption. It is used more for art photos or snapshots. You can print with this paper on any printer.
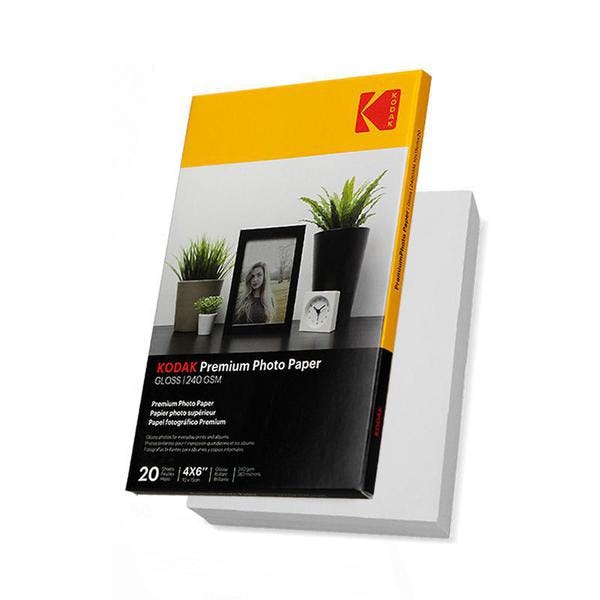
Kodak Photo Paper

Source: Amazon

4. HP CR757A

This photo paper is glossy and recyclable. It is quick drying and easy to handle. It is compatible with any printer. Used for basic or home photography. It is a comfortable and effective option.
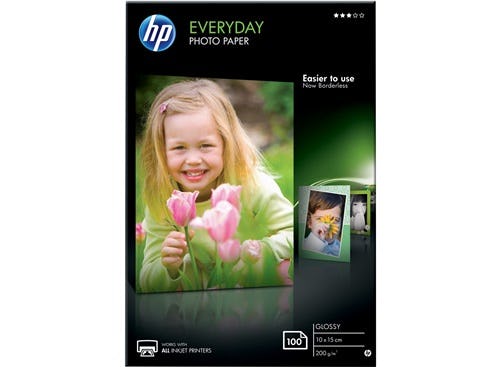
HP Photo Paper

Source: HP Store

We have reached the end of this article! We hope you found it very interesting and that, above all, you have learned everything you need to become a complete master of photography. Remember that there is no one style of photographic paper better than another, since, like many things in life, it depends on your own experience and tastes.  

If you want to learn more about the world of photography, we recommend you explore our online photography courses , where you will learn from the fundamentals of photography to how to master the best photo retouching programs. 

Now it’s your turn, grab your camera and go out and capture wonderful moments!

Which Mobile printer is better?

With more and more people using mobile devices as their main entertainment and work tools, printers are less common in the home. Surely you have uploaded your favorite photos on Facebook or Instagram, but there is still space to frame and take physical photos. In this comparison you will find the best mobile printer according to your needs. After testing the most relevant of the market we have finished with the following.

Which ones are selling the most?

  1. Xiaomi TEJ4018GL — Portable 300 DPI Pocket Mini AR Photo Printer with DIY Share 500 mAh, …

Scan AR photos: just record or upload any video while printing photos, and you can experience the real and dynamic AR photos at any time …

Portable Printer Mini Mobile Printer Photographic Printer Mini Mobile Thermal Printer …

【Immortalize your best moments, mini gift printers】 The mini printer is small and light, with a design the size of the palm of your hand, …

Canon Zoemini Pv-123 — Mini printer (Bluetooth, USB, 314 x 600 dpi, Canon Mini Print) color white

  • Print from your mobile device

mobile printer by function

Below we have made a section in which we have put them to compete with each other, but first we will look one by one at their aspects and what has stood out when we have tested them.

Best value for money

Somewhat cheaper than the other mobile printers, we find the CP1200. A less compact but more complete model. It continues to allow us great mobility, with an attached battery and a button dedicated to Wi-Fi. On a single charge you can print up to 54 photos, compared to far less quantities of previous or past Selphy models.

  1. Canon SELPHY CP1200 — Photo Printer (Dye-sublimation, WiFi, USB 2.0, PictBridge)

Best value for money . The cheapest both to buy and in long-term maintenance. In addition, the quality is also the best although it has to be plugged in.

Again, we come across a mobile photo printer made more for fun than professional use, unless your business is all about taking snapshots as samples and such. It has characteristics that make it useful and enjoyable . From printing passes, messages or photos for albums, also making up to 8 collages per page. In this case we find an Air Print printer, which means that you can connect it from your iPhone or iPad without having to download any type of driver that you would need on a PC or Mac.

This Canon SELPHY CP1200 is a model that we have already seen in our comparison of printers in the photographic category (you can use the menu or web browser to find it if you are interested), so we discussed it a bit in passing. What you have to know in terms of quality is that it does have bright and quite vibrant colors . Again, a tool to have fun and easily make memories with your mobile.

More portable

This Polaroid was another mobile printer that we wanted to try because of the nice words. Without a doubt it is very compact and light , not even reaching 200 grams of weights. In fact, it is not much thicker than the smartphone with which you intend to use it. You can easily hold it in your hand and it fits perfectly in your jacket pocket. In this aspect, the only thing that could be improved would be that the cap to put photo paper easily pulled out a hair with the pressure of the thumb.

2. Polaroid Zip — Mobile Printer, Bluetooth, Nfc, Micro USB, Zink Zero Ink Technology, 5 x 7.6 cm, …

More portable . It is the one that weighs less, with a smaller size than the rest, the photos are clear, without spots and although the quality is not perfect, it is the one that is in the middle of the three.

Like the previous HP, Polaroid made the Zip easy to set up . Ironically, the brand has made it so simple that we have made it complicated for ourselves, taking more steps than necessary. To configure, we only have to download and install the associated Zip app on the smartphone and print from a mobile by linking it with Bluetooth or NFC . You will only have to put the paper correctly and you will have it ready.

It has a lithium battery, and you can charge the Polaroid with a micro USB-USB cable. The only physical control is the power button placed inside. It is the easiest thing you can find in a printer. Another reason for being so is because the Zero Ink Printing (ZINK) system, instead of using ink and toner, the paper uses heat-sensitive glass sealed with protective polymer, and heats them up in less than a minute .

It is true that getting a result is not the cheapest, since a batch of 30-sheet paper costs about € 10–20 depending on where you buy it, but the photos are clear and without stains , although at low resolutions they results are a bit darker than you would expect. You are not going to buy it to have the best quality (for this you already buy a photographic printer ), they are to have a process, decent in quality but fun and easy to remove . Something we liked is that the paper can be glued from the back , so you can use the photos as stickers .

The app that controls this mobile printer has an intuitive interface , although we have found that perhaps too many help boxes appear that already bother a bit the second time you see them. We do not complain much, since it lets you print photos captured with the smartphone camera or whatever you have in memory. In addition you can also do basic editing, for example if you want to compensate the blacks, rotate them, reduce them or apply filters to the colors.

We liked that it can produce collages of up to 9 images , although it thinks that the result will be quite small. You can add paintings, borders, icons and more, something that users over 12 will undoubtedly use to have a good time. In fact, you can even add secret messages with QR codes that can lead to websites, links, audio messages or others. If you want to use it a bit more professionally, you can also create professional cards, although in this aspect it does not allow much control over the text.

Best speed and portable ratio

First of all we have this HP, which for less than € 150 you take the photos of your mobile in small prints. It is very easy to operate and use. The app for both iOS and Android offers fun editing and printing options . We have taken a little more than ten photos and we liked the exhibition of all of them. While it is true that the trend of snapshots seems to have a slightly clearer trend, but not to the point that we would touch options before.

HP Sprocket Portable Photo Printer (Inkless Printing, Bluetooth, 5 x 7.6 cm …

Best speed-portable ratio . The result is looser than the rest, but very easy to operate, with good exposure and with features in social networks that make it very user-friendly.

The color is impressive, the white balance is great as is the saturation . Also, as we have already mentioned, the printing process is very user-friendly. The application keeps track of what you have already printed . The Instax also incorporates a reprint button in case you want to make a copy without having to touch all the options again. Of course, it is also very good for me to show you how many pages are left in the mobile printer, so you don’t have to open it to check.

If you have a SLR / DSLR and you can send jpegs to your device, then you can print them with the HP. For those who have a camera with Wi-Fi or certain connectivity, it is especially easy to transmit photos of it to your mobile. Also while editing with your app you can save the changes and print it after touching everything with your smartphone.

As if that weren’t enough, this camera also lets you print from Facebook or Instagram . Regarding the connection, we did not have any kind of problem connecting a multitude of devices to the same printer. But something to keep in mind is that unless you’ve had a mobile photo printer before, you don’t know exactly what the end result of the printing will be until you’ve gotten a few out and you know it from the street.

The only thing that we can say as a negative aspect or that could be improved on this thing, is that well, you will not have the same element of surprise as with an instant camera. That is, with those you make the photo and it is printed directly, but with this you can review it and decide whether to take it or not, but yes, it is a very fun gadget . But you already know that it is not a substitute for printed products, such as albums and others. It’s great for capturing moments like holidays or special occasions .

As this model is very portable , you can take it wherever you want, be it to take wedding photos and make instant memories. In fact you can give a souvenir to your friends or clients so that they will have even more desire to receive the entire photography set. You see that the uses can be as many as you can think of. Plus kids love instant reveals like these, so if you have little ones around you you can expect to have a lot of fun.

Comparison between our favorites

Do they all look the same? Due to the results and characteristics, they may seem similar. However, to get rid of doubts if you do not know which printer for mobile to buy, we have put these “to fight”. These have been the results.

More portable: Polaroid Zip

If you are thinking of buying an instant printer like this, chances are you want it portable, or at least you don’t have to worry about where you constantly take it. In this category we have eliminated the Canon Selphy quite quickly, as it weighs about a kilogram and has to be plugged in to work.

Between the Instax and the Zip, they both fit easily in a backpack and weigh grams. But side by side the Zip stands out as it is more modern and has a much more attractive monitor panel to operate.

Faster: HP

All three printers will take your snapshot in a matter of minutes, but only the Instax will do it in seconds . The speed we are talking about here refers to the time the photo is taken to print since we press the button that orders it.

Surprisingly, we felt that the Polaroid took its time despite being newer. The Canon by its side also took more than a minute. In fact, it prints color in color, up to a total of four.

So the HP wins, but the thing is tricky, because unlike the other two, the photo is not ready once it has come out . You’ll have to shake it old school . Well, you don’t have to, but you will have to wait. For us it is a feature that wears out and that makes this mobile printer even more appealing.

Best quality: Canon Selphy

It is not easy to make Air Print printers that you can put in your hand that on top of the photos you take are of quality. This is surely why Canon refused to sacrifice quality for size. Although it is not going to dig in your bag, if it would in a backpack, but also print with similar quality to your copy shop .

If we compare it with the others, the Instax is the one that disappoints a little more even though it is faster. Sometimes you will see that the result is somewhat fuzzy, but some are looking for that nostalgic feeling and will like this, but for most consumers, the quality is not worth the purchase of paper.

So we have that the Polaroid Zip is in the middle, producing shiny results but if you look closely they have some grain. Let’s say that’s what you expect from an instant mobile printer.

Cheapest: Canon Selphy

Not only to buy, but also to maintain . The price difference between them is not very large, but before you make a decision based on this, consider the paper factor . Depending on how often you decide to print, one that you demand a lot of can get expensive very quickly. Of the three printers, the Canon Selphy ends up being somewhat cheaper at around 33 cents per print.

What if I don’t want a small, instant printer?

Believe it or not, some people have come this far not looking for a printer that they can use with their mobile but that is NOT instant . We have you covered too.

All those that you will find on our page compared and analyzed are compatible to print from mobile . To this day and as we have said in the first paragraph, brands know that users use their devices constantly as main tools, so it will not be difficult for you to find an Air Print or Android-compatible printer, because they will all have some kind of connectivity type wifi , Bluetooth or NPC.

So the only thing we have left to recommend is that you look for the ideal type of printer for you. If you already have it clear, you will only have to write a couple of words to our search engine or use the menu and you will find the best in your category that you can print from your mobile.

How to print from mobile

Ok, you have your mobile photo printer or if you are not thinking about buying it, but first you want to know how to do it to print from mobile. Here we show it to you so you can see that it is very simple and it is not more complicated than it sounds. The truth is that knowing that you are printing something from anywhere with the internet is a good feeling, let’s see it.

Google Cloud Print

It is the official Google solution for printing from more limited devices. Whether you have an Android phone, Android tablet, or a Chromebook. Before this, it was necessary to have a third-party app, but now Goolge gives it to us.

First, you have to make your printer available via Google Cloud Print. You can do this by connecting it to a computer and activating Cloud Print in Google Chrome (the browser). In this way, your machine will be associated with your Google account and you will be able to print from anywhere.

Then install the Android application. Open a new tab on the web or the document you want to print, click on the Share button and share the document with the Cloud Print application. This way you will be able to remove leaves from there. Remember that here you will have to be using the same Google account in Chrome and Cloud Print.

As this application works with the internet, you can use this feature to print from anywhere with your mobile printer. In case you are using a desktop computer or a laptop. The Chrome browser has built-in support for using Cloud Print, and it has cool features, like sharing the printer with other Google accounts and giving people the ability to pull out sheets as well.

Print to PDF

A skill that is not only useful for printing on your computer. On your Android phone or Tablet, you may want to get a PDF document that you want to access and archive with longer, even if you don’t have an internet connection. Still there is no option to “print” in Android applications, so the option to do this is not so obvious.

To know how to print from your mobile as before, you will need to use the Share option. You click on whatever application you are using, and select the app with which you would like to share the content. You will only need an application that converts the web into a PDF file.

Cloud Print also lets you save your documents in PDF format, you just have to click Share again, click Cloud Print and use the Save to Google Drive option. This will save the copy in PDF. Then you can go to Drive to access it if you don’t have internet.

Print with specific brands

Some other modern mobile printer is wifi and allows you to connect with the computer wirelessly. This means that technically your Smartphone or Tablet could connect using Wi-Fi to the printer and print, without a physical connection.

To do this you need a Wi-Fi printer and an Android application that supports printing. For example, HP offers ePrint , Epson offers Epson iPrint, Canon Easy-PhotoPrint, or Samsung offers Mobile Print to take documents, scan and even send faxes. We have already commented on it a bit but each printer brand has its own way of doing it. In this aspect, you will only have to make sure that the manufacturer is the model you buy, and which application you will need as well as the features it incorporates.

Print directly from USB, Bluetooth, or the network

Let’s say you have a printer plugged into your Windows network. Alternatively you may have a printer that you want to physically connect to your device with USB. Or that you have it wireless with Bluetooth.

All these types of printer are supported by Android. Google recommends touching the Cloud Print or PC options to connect it, since Android does not support all these types of printers.

If you want to print directly with one of these, you need a third-party application. Unfortunately they don’t have much quality that they do it for free. One of the ones I like the most is, for example, PrinterShare with which you can print on a Windows network, Bluetooth or even USB. In the case but you want to use advanced features, you will have to pay about 10 euros for the Premium version of this app. Although good, you can print test documents.

Either way, what we recommend for convenience is Google Cloud Print, or if you have an Air Print printer because you have an Apple device, it will also make it easy for you. In an idea world, with Google Cloud Print you don’t have to keep your mobile printer connected directly to a computer. Because you can remove sheets in others, but it does not give such good support, it is better in this case to use the specific applications of each manufacturer, since third-party applications cannot work in some cases.

How to defrost ground turkey

If it’s Thanksgiving and you’ve forgotten to defrost your turkey in the fridge, don’t panic. It is entirely possible to cook a frozen turkey in the oven and have a delicious and safe result for you and your family to eat.

Part1

Thawing turkey in the oven

  1. Take the turkey out of the freezer and unwrap it. Use scissors to cut the mesh and plastic from the turkey. Leave the giblet bag in the turkey for now.

2. Place the turkey on a roasting rack inside a roasting pan. 

3.Preheat the oven to 325 ° F (163 ° C). If there are multiple racks in the oven, remove all except the one in the bottom third. This way, there will be enough room for the turkey.

4. Place the frozen turkey in the oven and let it thaw for 2.5 hours. 

Avoid opening the oven during this time so the heat doesn’t escape. After 2.5 hours, the turkey should be thawed and will be golden brown. Don’t worry about seasoning the turkey just yet, the seasonings won’t stick to a frozen turkey. You can season it after it thaws in the oven for a couple of hours.

5. Use a meat thermometer to check the temperature of the turkey after it thaws. Place the thermometer on your breast or thighs, and give it a few seconds to read the temperature. At this point, the turkey should be around 100 to 125 ° F (38 to 52 ° C).

If the temperature is less than 100 to 125 ° F (38 to 52 ° C), allow the turkey to continue roasting and check it periodically until it reaches the proper temperature.

Part2

Spread and season the turkey

  1. Remove the giblet bag from the turkey’s neck. The giblets are the organs of the turkey that the butcher has packed and stuffed into the neck of the turkey. Now that the turkey is partially thawed, you can remove the giblets and discard them (or use them to make a sauce )
  2. Spread ½ cup of melted butter on the turkey with a brush to spread. Covering the turkey with butter will give it more flavor. If you don’t have butter, you can use olive oil instead. 
  3. Season the turkey with salt and pepper. Start with 2 tablespoons of salt and pepper, and if it’s not enough to cover the entire turkey, gradually add more. Sprinkle the seasonings on top of the turkey, then rub gently with your fingers.
  • You can also use other types of seasonings, such as rosemary, thyme, and sage.

Part3

Roast the turkey

  1. Roast the turkey for an additional 1.5 to 5 hours, depending on its weight. The heavier the turkey weighs, the longer you will need to roast it. You can determine how much the turkey weighs by checking the wrapper it came in. [9]
  • 3.6 to 5.4 kg (8 to 12 lb): Roast for an additional 1.5 to 2 hours.
  • 12–14 lbs. (5.4–6.4 kg): Roast 2–3 more hours.
  • 6.4 to 9.1 kg (14 to 20 lb): Broil for an additional 3 to 4 hours.
  • 20–24 lbs. (9.1–10.9 kg): Broil for an additional 4–5 hours.

2. Check the turkey every hour. When you check the turkey, check its temperature with the thermometer to make sure it is rising. You can also slather on more melted butter or oil for added flavor. If the turkey looks like it’s burning or getting too crispy, cover the top with aluminum foil.

3. Remove the turkey from the oven once it reaches 165 ° F (74 ° C). The turkey will be fully cooked and safe to eat at this temperature. Check the temperature with the thermometer at different depths in different places to make sure that all of the turkey is cooked through. [eleven]

  • Check the center of the turkey with the thermometer, as it will take longer to cook.

4. Let the turkey cool for 30 minutes before serving. After 30 minutes, the turkey should be cool enough to cut and serve. Slice up the turkey and serve it with its stuffing, mashed potatoes, or your favorite garnishes. [12]

Warnings

  • Never try to grill or fry a frozen turkey. Cooking a frozen turkey in an oven is the only safe way to prepare it without first thawing it.

HOW TO USE YOUR KITCHENAID I MIXER?

Yes, here I am again, after 3 months of absence. Thank you very much to all of you who have written to me asking if I was okay since I was not updating the blog. Yes, I have been fine (well regular, with a cough that has lasted for 3 months), traveling a lot, teaching courses and coming home exhausted without wanting to do anything or certainly not wanting to start baking. It seems that my body has already gotten used to this routine, the cough has almost healed and the exhaustion is beginning to pass (with the help of vitamins). Anyone who says that traveling is not hard, is that he has never done it and I do not mean a simple vacation trip, I mean traveling for work. But hey, I am not complaining because it is what I have chosen and thank God I can do it.

Today I’m going to talk to you again about the KitchenAid stand mixer. But first of all I want to clarify that with this I am not telling anyone to buy this blender. Not even the best. That each one buy what they want, what they like the most or what their finances allow. I just talk about the KitchenAid with this devotion, because I have it, I love it and it works wonders for me. Possibly if I had a Kenwood, a Bosch, an Electrolux, a Smeg or a Rowenta I would talk about them, but since I don’t have them, nor do I know them, I talk about my KitchenAid and also, I clarify in advance that the brand does not pay me !!! ! Info Kitchen Aid that I have written over the years, they are still the most visited blog and not only that, you keep writing to me with various doubts or to ask which one should you buy? and how to use it? But I hope that this post and the next are the final ones. and clarify all the ideas.

In answer to the first question, I will be brief. If you are going to use it for home use, then go for the Classic or the Artisan (4.8 liters or 6.9 liters). If you are going to give it a lot of use or have a business, without a doubt a professional. As its name indicates, those for domestic use are for use at home and their professional use is not recommended. Then everyone is free to do what they want with this information.

In answer to the second, I know it can be a bummer to read the instructions for an appliance, and I am the first to sing the “mea culpa” because I never did. When I bought my first SLR camera and saw the “billet” of instructions, I quickly filed it away in the instructions and warranties drawer. When one year I did my first photography course, I had to read the instructions and guess what? Everything I was learning in the course was perfectly explained in the instructions, yes, drier and with less frills, but it was there. Not that it was of much use to me, but the information was there.

In the case of your KitchenAid stand mixer, the instructions are just that, instructions that help us to better use the machine. And do not think that it only includes information about voltage, electrical precautions and their care, it also teaches you how to better handle your dough mixer and, as incredible as it may seem, it does it in only 10 sheets.

Anyway, in case you are a beginner, below you have all the information you will need, filtered, explained, with flourishes and practical examples.

The KitchenAid stand mixer includes three accessories, the normal whisk or paddle, the whisk and the dough hook, as well as a strainer-lid.

Accessories Ka

WHAT IS EACH ACCESSORY FOR?

The normal mixer or paddle is the most versatile accessory of the mixer, suitable for beating-mixing all kinds of mixtures from normal to consistent. Ideal for preparing cakes, scones and excellent for working with butter, margarine and other creams. It is also used to make purees, sauces, patés and mixes homogeneously the ingredients for meat pies, meatballs, and perfectly prepares a buttercream or buttercream. It can be used for both a smooth ride and a smooth incorporation of ingredients. It is important to start beating at a low speed and work your way up to the right speed. There is for sale a shovel that has a silicone edge (the second starting from the left in the photo) and that helps a lot when it comes to beating the butter as it cleans the walls of the glass.

The whisk is the ideal accessory for incorporating air into preparations. It is used to whip cream, egg whites, ice cream, mousses, meringues or mayonnaise. It is also a great help to break up the lumps in sauces and creams. It is also used for sponge cakes without butter, as well as for frothy egg white glazes such as Italian, Swiss meringue, etc. You should start beating from the minimum speed and go up. It is important not to beat too fast, otherwise less air will enter and the mixture will be heavy. Remember that this whisk is NOT used to beat butter as it will stick and you will end up with a heavy batter, difficult to handle and clean.

The dough hook is used to prepare and work doughs for breads, brioches, focaccias, rolls, pizzas and pasta doughs. We can also use it when we add candied fruits or nuts to the dough of a sponge cake. The hook is ALWAYS AND ONLY used at speed 2. Using a higher speed with a yeast dough will increase the chances that the machine will fail. Before starting to knead the dry ingredients are mixed with the normal whisk or paddle to achieve a uniform distribution, after which it is changed to the hook when incorporating the liquid ingredients proceeding to knead them slowly. The dough hook effectively kneads most yeast doughs in just 4 minutes.

This is a clear example that the same accessory is not used in all preparations during the entire process. Other cases are, for example, when we make a buttercream based on Swiss or Italian meringue, we will assemble the meringue with the rods, however when we start to add the butter we must change the rods for the normal whisk or shovel. Another example is when a preparation brings whites to the point of snow. In this case we will mount the egg whites first and reserve them. Next, we will beat the butter, sugar and the other ingredients with the shovel. Finally we will incorporate the whites, something that I personally like to do by hand with a silicone spatula.

Strainer-lid: This accessory has a double function, on the one hand it directs the ingredients towards the walls of the bowl and on the other it reduces splashes by not letting them come into contact with the accessories. I honestly don’t use it.

WHAT SPEED DOES I BEAT?

Now that you are clear about how and when the accessories are used, you will become obsessed weighing that you want to have a recipe book that tells you like an automaton at what exact speed and for how long you should beat the ingredients, but this is something that you will go watching over time. It’s like when you started driving, sure you always had doubts about the gears you should use. Now I shift to second? I put third? Shall I reduce to fourth? An English friend told me, calm down, listen to the engine, it talks to you and tells you. At first I did not understand it, but there comes a time when you become one with the car, you listen and understand its sounds and you know what it needs at all times. Using your KitchenAid stand mixer will be pretty much the same. Until you have used it a few times, you won’t know if you need speed three or two. I promise you that after reading the following clarifications and after using your KitchenAid the first few times you will know what speed and approximately what time you need for each preparation. Let’s go there…

Your KitchenAid Stand Mixer has 10 speeds. All of them have a “Soft Start” function, that is to say that regardless of the selected speed, it starts working at a reduced speed, to prevent the ingredients from splashing or flying off. The speed will automatically increase until the selected speed is reached. (Well, I make a point here, since in these months during the courses I have come across some quite aggressive KitchenAid and this soft start thing … I laugh !!!)

Your KitchenAid Stand Mixer will beat faster and better than most electric mixers, so most recipes will need to adjust the mixing time to avoid over-mixing or mixing. You will be the one who determines, by observing the preparation, the desired appearance and described in the recipe. For example, stop beating when the mixture is white or smooth and creamy. Or maybe, beat until soft peaks form. Here not only observation comes into play, but common sense.

HOW ARE THE SPEEDS USED?

Speed ​​1 REVOLVER: To mix slowly, combine, puree and start any blending process. To add flour and dry ingredients to the dough, as well as to add liquids to the dry ones. Do not use this speed to knead bread or other yeast dough

Speed ​​2 SLOW SPEED MIXING: For slow speed mixing, pureeing, thick mixes and higher speed stirring. To knead yeast dough.

Speed ​​4 MIXING – BEAT: To beat semi-dense doughs such as cookies. To combine sugar and butter. To incorporate the sugar into the egg whites for the preparation of meringues. Medium speed for biscuits or cakes.

Speed ​​6 BEAT – CREAM: To beat at medium high speed or to whip.

Speed ​​8 – 10 BEAT / MOUNT AT HIGH SPEED: To whip creams, egg whites and meringues. To whip small amounts of cream, egg whites etc.

Intermediate speeds 3,5,7 and 9 can also be used.

When you finish using your stand mixer, it is preferable not to leave the accessories placed on the shaft, you can store them perfectly inside the glass.

SETTING YOUR KITCHENAID STAND MIXER

The first thing you have to do before using your KitchenAid stand mixer is to check that it is properly adjusted, that is, that the distance between the flat beater and the base of the mixing bowl is correct.

If the flat beater or the rods are too high, the bottom of the dough will not mix well. Otherwise, if they are too sticky, they will scrape the bottom of the glass and hit it, wearing down the coating on both the beaters and the glass.

Although this distance is factory regulated, correcting or checking this distance is absolutely necessary and very easy to do. With the mixer turned off and unplugged, raise the head or lower the glass to its lower position, (depending on which model is your model) there you will find a screw. Turn it slightly counter-clockwise (left) to raise the whisk or clockwise (right) to lower it.

The exact distance can be measured by putting your robot in gear at speed 1 with the flat beater. Insert 1 coin of 5 cm or a chickpea and start the machine. The flat beater should touch the coin lightly on each turn. If this is not the case, we will adjust the screw with a screwdriver, giving a quarter turn.

WHAT ACCESSORY DO I BUY?

The KitchenAid stand mixer has many accessories: grater, rotary cutter with optional blades, mincer, stuffer, food processor, juicer, pasta roller, ravioli accessory, cereal grinder, can opener, refrigerator, etc … these accessories at high speeds. I cannot recommend which one to buy or not since it depends on the use you are going to give it. If you make pasta, you will undoubtedly succeed with the accessories to make it. If you make sausages, the mincer and stuffer will be the best. If you like ice cream, the refrigerator will be a good purchase.

I have several of the above and personally I use the meat mincer a lot. The refrigerator, I also have it and I am very happy with it although I do not use it as much as it should.

One accessory, which is never usually part of the KitchenAid buyers’ plans that I highly recommend, is to buy a second glass especially if you are going to use the KitchenAid seriously.

Sometimes I am making several recipes at the same time, and I have a covered glass raising with dough and another mixing a sponge cake. Consequently, a second blade is necessary and if it is with the silicone tongue, better. For me, this is a good investment.

As for the crystal glass, I have mixed opinions. On the one hand I love it. I find it beautiful, it is very lucid, funny and almost hypnotic to see the ingredients inside the glass. On the other hand, it weighs a lot. I am not able to hold it by the handle with one hand or when it is empty, but on the other hand I am a “lazy”.

I hope that after reading these simple instructions, you have a better understanding of how your KitchenAid stand mixer works and are encouraged to adapt many recipes.

In the next post I will talk about the procedures and speeds to use to make sponge dough, yeast dough, whip egg whites, whip cream, etc.

Do You Know When To Use A Food Scale?

The most important moment to use a scale is when you need to measure the ingredients of a recipe to reproduce it accurately, be it baking or cooking. Many people use scales for healthy diet needs and portion control.

Weighing ingredients is much more accurate than using volumetric measuring cups, even when using liquid and dry measuring tools correctly.

The scales are available in different sizes and weight capacities, with models that can measure down to fractions of a gram. Kitchen scales are usually analog or digital.

balance-steel-polder-500x500

Analog scales do not require batteries, have a more familiar style, and are best for approximating weights.

TAYLOR_TE10T-500x500

Digital scales are more accurate than analog scales and can be very useful for a complex recipe, such as French macaron, that requires a precise balance of liquid and dry ingredients. They are easier to read and set up (for example when multiple ingredients need to be measured in the same container).

Some scales even have density conversion capabilities, so that you can accurately weigh liquids. Mixologists use this function precisely for their cocktails.

Weight vs. volume

Various factors can result in different amounts when measured by volume, such as a cup of poured loose walnuts, compared to a well-filled cup of walnuts cut into small pieces. That’s why weighing ingredients can make a real difference in the success of your recipe.

Good recipes are consistent . 

If you are a veteran baker, you know how important it is to be consistent in your recipes. Measuring weight is far more consistent than determining volume alone.

Consider the following factors when choosing your balance:

  • For greater precision in small quantities and for greater versatility, choose the electronic or digital scale.
  • For regular kitchen use, a 6-9 Lb capacity scale will suffice for most tasks.
  • If you are only constantly measuring large items, such as roasts, choose the 22 lb scale .
  • If you are measuring ingredients for dietary needs, choose the electronics or diet scale.

* Find our Scales at  paragourmet.com

How To Install a Chimney Liner

Installing a stainless steel fireplace liner is relatively easy, especially if you don’t mind crawling into tight spots. To install your fireplace surround at home, this is what you need to do:

Step 1 — Prepare the chimney liner for installation

To prepare the stainless steel fireplace liner for installation, remove the liner from its packaging and lay it on a flat surface. Hold the bottom connector of the appliance and then attach and tighten the hose clamp to the liner. Make sure the hose clamp is tight enough to hold the liner together.

Step 2: measure and cut the siding to fit the fireplace

Using a tape measure, measure the exact length of liner needed for your fireplace. Add 1 foot to the length needed to cover your fireplace from the bottom to the crown. After you measure the liner, get a couple of heavy duty tin scraps and carefully cut the liner. For safety reasons, make sure you don’t leave ragged edges on your siding.

Step 3 — Insulate the cladding

The chimney liner must be insulated from top to bottom. To do this, get the insulating wrap and measure the amount needed to cover your siding and then add a 1-inch allowance for the overlap. After you cut your insulation wrap to fit your siding, you need to lay the insulation wrap on the ground with the aluminum side facing the ground. Place the siding in the center of the insulation, and then wrap the insulation around the siding. Leaving at least 1 inch of overlap at the seam and then secure the overlap with the use of masking tape. To secure the insulating wrap, spray adhesive on the liner and then use your hand to stroke the insulating wrap in place.

Step 4 — Protect the Insulation Wrap from Damage

To protect the insulation wrap from damage when installing the fireplace liner, encapsulate the entire length in the liner using a stainless steel mess. To do this, place the insulated fireplace liner in the center of the stainless steel clutter and then wrap the clutter around the liner. Use the hose clamps to keep the stainless steel mess in place. Be careful not to damage the insulation wrap while tightening the hose clamps.

Step 5 — Installing the siding

You may need a partner to help you install your fireplace liner, so make sure you have the necessary labor ready before you begin installing your liner. To install the liner, tie the rope around the liner, ask your partner to pull the rope from the top of the chimney while guiding the liner up the chimney. Once the chimney liner is in place, place silicone caulk around the chimney crown, then press the top of the liner inward. Secure the bottom of the liner and then attach the bottom of the liner to the connector on the appliance.

How to install a terracotta fireplace liner

Fireplace inserts are essential to the integrity and safety of masonry fireplaces. Older homes, built before code enforcement, often have lined fireplaces constructed of brick and mortar. Mortar deteriorates over time, allowing heat transfer to combustible materials. Terracotta siding can be installed to correct this problem. “A round tube fitting is the most efficient, but rectangular chimneys fit the best in brick construction,” explains Kenneth Nolan, author of Masonry and Concrete Construction. Experienced installers should perform the installation of a terracotta fireplace liner.

Instructions

Measure the qinside of the existing fireplace for the length and width of the fireplace walls. Accurate measurement is essential to selecting the proper size terra cotta fireplace tile.

• Purchase tube tiles. “Inspect clay fireplace tiles before you buy,” indicates Mark McCain. “All the tiles that you select must have identical interior dimensions and must be free of deformations and cracks,” he recommends.

• Place the first tile in the tile aligner tool and the top edge of the tile with butter fire cement. Lower the tab instead. Make sure the tile is centrally located, with even air gaps around it.

• Butter the top edge of the second tile and lower it into place precisely with the first tile.

• Remove the excess cement from the joint between the tiles with the most common tool. A loop wire tied to a long pole works well for this purpose.

• Continue to tile, align and smooth joints until the tiles extend out of the chimney, per your building area codes.

Tips and Warnings

  • When fitting a fireplace stove, cut a clean-out hole in the bottom of the fireplace and cut another hole for the thimble where the pipe will be attached. Cut matching holes in terra cotta tiles and install in proper location. After the chimney liner is finished, mortar a door into the cleanout hole. The mortar thimble in place.
  • Prevent cracking of terracotta fireplace inserts by installing tiles centrally within the fireplace walls, leaving space between the tiles and the existing fireplace. Fireplace inserts will expand when heated.

How Does OCR Scanning Work?

Have you ever had to manually enter the information of a document in a digital form word for word? This is common with transferring data from paper to a digital form. Or maybe you are writing a new collateral piece in DOC form from a PDF and the words are not being copied and pasted correctly? Whatever the route, there was likely human error during the process. That's natural, too, considering that many companies still enter and transfer data manually. What if we told you that there is a way to digitize this information in a clean and easily replicable way? Consider document scanning by OCR, a technology that can be integrated into a workflow solution to better extend the efficiency of processes.
By digitizing paperwork for use in workflows, companies are equipped to handle multiple forms of data entry, be it through documents, form submissions, third-party system APIs, chatbots, or other technologies. The result is increased productivity in workflows, savings in time and costs, and the extension of the current value of the system to document-based processes.
By digitizing paperwork for use in workflows, companies are equipped to handle multiple forms of data entry, be it through documents, form submissions, third-party system APIs, chatbots, or other technologies. The result is increased productivity in workflows, savings in time and costs, and the extension of the current value of the system to document-based processes.By digitizing paperwork for use in workflows, companies are equipped to handle multiple forms of data entry, be it through documents, form submissions, third-party system APIs, chatbots, or other technologies. The result is increased productivity in workflows, savings in time and costs, and the extension of the current value of the system to document-based processes. By digitizing paperwork for use in workflows, companies are equipped to handle multiple forms of data entry, be it through documents, form submissions, third-party system APIs, chatbots, or other technologies. The result is increased productivity in workflows, savings in time and costs, and the extension of the current value of the system to document-based processes.


What is OCR?

OCR is short for Optical Character Recognition. According to Scanbot, OCR is an "image processing technology that provides a convenient way to convert paper documents to a digital format." Most commonly found in document management, OCR can play a vital role in improving the automation of your organization's business processes.

During OCR scanning, an algorithm recognizes characters in printed fonts and converts them into digital format. Once this is done, the digital format is easily searchable and editable. OCR scanners are easily customizable and therefore ideal for industries with paper-intensive processes. The industries that benefit the most are banking, higher education, legal, insurance, telecommunications and others, since they handle huge amounts of data at the same time.


How Does OCR Really Work?

An ordinary scanner or copier creates what is known as a raster image, or a collection of black and white or colored dots. To take and reuse data from camera images or image-only PDFs, you need OCR software that takes the letters from those images to create words, and then sentences, to access and edit the original content of the image. page. This is done by looking at each line in the image, with the OCR scanner finding out if the black and white dots represent a certain letter or number.

There are several OCR tools to convert image-based documents to PDF, .docx, or other formats. Key features that differentiate application tools from OCR, according to TechStic include character recognition accuracy, page layout reconstruction accuracy, multi-engine voting technology, language support, support for Searchable PDF output, speed and user interface (UI).


OCR Benefits

By incorporating OCR into your business process management (BPM), you can digitize and incorporate documents into your workflows. Textos del Amazonas is an example of an OCR scanner that integrates well with a smart workflow solution. Some practical applications of OCR include:

1. Print documents. 
First, you will need the best printed version of your existing document. This usually involves photocopying to increase the contrast between the page and the print. Things like dirt marks, creases, and ink stains will increase the likelihood of inaccuracy and recognition of wrong words.
2. Scan. 
Using a flatbed scanner requires everything to be scanned one by one. With an OCR scanner, scanners typically scan the next page automatically.
3. Color. 
OCRs only read what is and what is not. The first step is to scan a black and white image of the original, then scan in color. If something like a smudge appears on the original, OCR can detect the difference in the color version through lighting changes in the black and white version. Without this critical first step, OCRs will not work properly to identify color patches, blemishes, or other disturbances.
4. Correction. 
Although not as comprehensive as a human editor, OCR scanners can help eliminate human error associated with writing. Using technology similar to Microsoft Word, an OCR scanner can make suggestions to help you write better while creating new documents.
5. Designs. 
A great OCR scanner will automatically detect multiple columns of text, tables, and images. Those images are turned into graphics, the tables are easily transferred, and the columns are separated the right way.
6. Digital workflows. 
OCRs can be used to improve business process management software. Good OCR will help incorporate and extend an organization's document-based data into its digital processes. Data from legacy solutions is not lost in the process, but rather transferred to new digital solutions, such as intelligent BPM, to make data collection and storage more accurate and easier to implement in the future.


Available Solutions For OCR

Since not everyone uses an intelligent workflow automation platform, it is important to consider the company and existing legacy software. Finding an OCR that extends the value of existing investments is critical to meeting long-term productivity goals. Having a seamless integration is also important.

1. Online and offline.
An online solution is a deal when something is used for personal or one-time use without involving sensitive information. An example that an online solution is ideal is printing a single-use document for a conference, something that is generally open to the public and does not require additional security. Offline solutions work on the individual device and data never leaves that device, dramatically improving security and reducing the likelihood of breaches. Industries that handle sensitive data like banks or insurance companies depend on offline sources to keep their information safe and accurate during millions of processes. Offline is also GDPR compliant, an important piece of legislation that affects banks around the world. With offline solutions, incorporating document-based data into another system - such as a workflow solution - can dramatically increase the efficiency of a company's internal processes due to automation, reduced paperwork, and limited space for human error. The result of this addition is a more secure OCR option for companies looking to increase operational efficiency in their workflows. 
2. Flat rate versus volume. 
For the price, volume and flat rate models are the most common for OCR scanners. On the one hand, volume models charge per document or user, in addition to an installation fee. On the other hand, flat rate solutions have a fixed price regardless of the number of documents scanned. The best way to avoid potential additional document surcharges is to use a flat rate model, especially for larger companies. If you want to get the most out of an OCR scanner, your best bet is to invest in a BPM with the ability to integrate well with an OCR system. The best OCRs take the entire data conversion process from the original document, image, or PDF and convert it in less than a minute. Time spent working with paper is significantly reduced, saving money that could be better spent elsewhere.

Since document-based data is not replaced, but simply transferred and then automated, industries such as healthcare, banking, legal and insurance can now operate more efficiently in their workflows.